Saturday, January 31, 2015

Apple Puff Pancake


I love a nice weekend breakfast. Apple Puff Pancake is a favorite cast-iron recipe. I assure you, it meets all the expectations. It looks delicious, so it's perfect for guests. It is quick and easy to stir up. It is inexpensive to make and the apple and eggs are value-added. Try it. BTW, if you don't have a cast iron skillet, just substitute a deep dish pie plate.

Apple Puff Pancake

4 eggs
3/4 cup flour
1/4 teaspoon soda
3/4 cup milk
dash of salt
3 tablespoons butter
2 tablespoons sugar
1/ teaspoon cinnamon
1 apple, cored and thinly sliced
powdered sugar to garnish
maple syrup

Preheat oven to 400 degrees. Place a 12-inch cast-iron skillet in oven to heat. Beat eggs. Then add flour, soda, milk and salt; whisk until smooth. Remove skillet from oven. Add butter to skillet and coat all sides. In a small bowl, mix sugar and cinnamon. Toss with apple slices. Arrange apples in a layer in bottom of skillet. Pour egg batter over apples. Bake uncovered for 25 minutes, or until pancake is puffy and golden brown. Makes one large pancake, which serves four. Best if served hot out of the oven with a sprinkle of powdered sugar and a little maple syrup.


Thursday, January 29, 2015

Tutorial: Shabby-Chic Sweatshirt


Plain pullover sweatshirts just make me look frumpy - and frumpy is the last adjective I want to add to an already bundled farmgirl style! But what's a country girl to do when I need the layer to stay warm? Plus a sweatshirt is a little more hard wearing and washable for everyday chores than a hand made wool sweater!

So here is an example of a fun sweatshirt makeover that gives me a bit of a longer line down the front and is cute in the bargain! I gathered several cuts of cotton from my quilting stash, along with a long length of recycled lace, my rotary cutting tools, my bias maker tool, regular sewing tools and thread to match the sweatshirt.


I started by cutting the bottom ribbing off. I used the seam line to guide my cut so the hem line would be even when I finished.


I marked a center cut line down the front. I also created a simple cardboard template and marked the curves at the neckline.


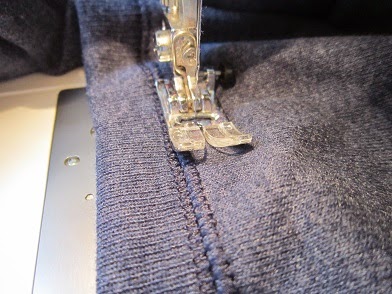
This next step is important! I stay-stitched on both sides of the cutting line BEFORE cutting so that the thin knit fabric would not pull out of shape later.


Then I cut on the marked lines and cut the ribbing off the neck.


Next, I cut the fabric for the patchwork ruffle. In order to figure out much fabric I needed, I measured the bottom edge of the sweatshirt and doubled that measurement. Allowing for 1/4-inch seams, I cut enough "patches" sized to equal that number. Doubling the measurement of the bottom of the sweatshirt makes a very ruffly ruffle. If you don't want that much ruffle, use a 1.5 measurement instead. I made the length of my ruffle 8 inches. It could be shorter, but I was going for a tunic length.


I sewed the patches together and finished the edges with a zig-zag stitch. Then I pressed the seams to one side and finished the edge of the entire ruffle with a zig-zag as well.


I sewed the lace on the right side of the ruffle, turned and pressed, and then sewed a finish seam along the fabric edge.


I sewed both lines of the gathering stitches. One at 1/4-inch and the other at 5/8-inch from the edge. Then I found and marked the center back measurement with pins.


With the right sides together, I matched the pins at the center back. Then pulled up the gathers evenly along the length and pinned the ruffle to the sweatshirt.


I used a 3/8-inch seam and sewed the ruffle to the sweatshirt. I turned the seam and topstitched along the edge of the sweatshirt, using a fairly long stitch and being careful not to stretch the knit. Then I pulled the gathering threads.


At this point, I needed to make the binding for the edge of the sweatshirt. First, I cut a square of binding fabric. The size of the square depends on how much binding you want. I cut a 20-inch square. I folded the square into a triangle along the bias grain and pressed this edge. Then I used my scissors to cut this pressed line, creating a long bias edge on two triangles of fabric.


With wrong sides together, I used my rotary ruler to measure and cut several 1.75-inch strips from this bias edge. Of course, the strips get shorter and shorter as you get nearer to points of the triangle.


I pinned the strips together at right angles and, with the right sides together, I sewed all the strips into one long bias strip.


I fed the strip into the widest end of my handy bias maker tool and pressed. I have the iron temperature at something less than cotton, but still hot enough to press a nice edge. I don't want to scorch the fabric while I am fussing to keep the folds even.


I pinned the bias strip to the edge of the sweatshirt, starting at the bottom of the lace on the ruffle. Then, I sewed the edging on, using a 1/4-inch seam.


I turned the bias edging and pinned it on the back. The ends are trimmed and folded up to enclose the lace edge. The back side of the bias needs to be pinned carefully so that the edge comes all the way to the seam, otherwise the finish seam on the front won't catch the edge on the back. If this should happen, and it seems to sometimes, however careful I might be, I just use a needle and thread and hand sew those little gaps. Once the bias edging is pinned on the back, I turned to the front and carefully sewed a finish seam.


I made some tab closures for buttons and sewed these to the top, near the neckline. I used three different buttons to match the patchwork style. Finished!


Tuesday, January 27, 2015

Tuesday Tips: How To Keep Your Frost Free Hydrant From Freezing


During the New Mexico winters, temperatures can get very low.  On those very cold nights, after I draw water for the sheep, I just know that the residual moisture in the frost-free hydrant will freeze before it dissipates from the inside.  The next morning, the hydrant is indeed frozen.  The handles of most hydrants are painted, so if the sun shines, the hydrant will thaw and function again by the end of the day.  However, if I cannot wait for the sunshine, I have to thaw the hydrant some other way.  A small bucket of hot water over the hydrant usually will solve the freeze.  I complained about my frozen hydrants once to my father-in-law who had a lifetime of experience farming in bitter cold weather.  He told me, in his understated way, “I put a little oil on the plunger once-in-a-while.  That seems to help.”  I took his advice, and indeed, I have eliminated frozen hydrants on cold mornings.

All hydrants have a rod that moves up and down inside the hydrant pipe.  When the handle is lifted, you will see this rod move upward through its attachment to the lift handle.  When you close the hydrant, the rod moves back downward.  By adding enough oil to coat the exposed rod and a few drops more to penetrate downward, the inside of the hydrant gets a thin coating of oil.  The oil adheres to the metal and repels water.  In the cold, the oil repels water, and any residual moisture cannot adhere to the metal parts and freeze the mechanism.  Furthermore, the hydrant handle and mechanism will function more smoothly all the time.  The oil needs to be a lightweight oil.  I prefer automatic transmission fluid (ATF) because it is lightweight and  ATF is an excellent penetrating oil.  After applying some drops of oil to the mechanism, you might see a little oil film on the top of the first bucket of water you draw.  I discard that first gallon, and I don’t see any more oil in the water after that.

Tuesday, January 20, 2015

Planning the Garden


Do most people plan their gardens? I'm not sure, but with a plan in hand I feel that I have a much better chance of maximizing success with a garden.

I can know how much seed to buy and know where and when everything gets planted. I can organize the proper environment for plants with similar light and water needs. A thoughtful plan takes advantage of layering and I can make companion plantings. A garden plan directs the timing of planting. I know which seeds need to be started ahead and which go directly into the ground. My plan takes into account any special equipment I might need for certain plants, such as stakes, cages, trellis, shade and row covers and I allow time to purchase or make these items. With a garden plan, there is a higher level of confidence in the varieties or cultivars that I have researched and chosen. I can also better manage the coming harvests. My family won't be forced to eat a glut of zucchini while wishing for more watermelon. Finally, the plan, with a few notes in the margins, establishes a record of the garden. Plus, I think it is great fun. Planning the garden gives me something to dream about in January.

I am sure that many experienced and successful gardeners plant their gardens without a plan, but here's the scoop on how to do it.

Tools

You'll need space like the kitchen table or a large desk to spread out your favorite gardening books, the best gardening magazines or other articles that discuss the culture of vegetables, and the current seed catalogs. You will also need some graph paper, a spiral notebook or gardening journal, a couple of sharp pencils, a big eraser and a straight edge ruler.

The plan

Before you sit down, gather accurate information about your climate and growing season. Pay particular attention to the date of the last frost and the average number of days between the last frost in the spring and the first frost in the fall. This number will help you know which vegetables you can bring to harvest. If you are planting perennials or fruit trees, you will also need to know the climate zone for your area. The most helpful people to gather this information from will be the county extension agency or a master gardening group in your area. You will also need to observe the amount of sunshine that falls on your garden spot. Will your plants be in partial shade during the day? Write all this information in the front of your notebook.

Next, list in the notebook all of the things you would like to plant this year. Then consult your books and magazines to learn what you can about each of these vegetables and what they need to grow. Based on your knowledge of your local climate and the growing conditions in your garden plot, decide if you'll be able to grow these vegetables in your garden. You may need to redo the list, bumping off those that have needs that you cannot supply. Sometimes conditions can be altered and now would be the time to research and make plans to alter or create micro climates for specific plants. Make a final list of what you will plant. For each vegetable, note the cultivation needs such as amount of light and water, how tall the plant will be, how much space it requires, etc. Later, you will try to group plants with similar needs together in your garden.

Now go through the seed catalogs in order to choose varieties. The catalogs will list several varieties for each of the vegetables you wish to plant. This is the most fun and time consuming part of the planning process. There is just so much to choose from! Look for those varieties that match your growing conditions as closely as possible. You may want to look for those cultivars that have a shorter time to harvest, a longer production time, one that is more water efficient, or one that doesn't bolt in the heat. Some varieties withstand the stress of drought, for instance. Some better tolerate shade. Remember the friends you made at the master gardener group? You might call them back and ask if they publish a recommended list of successful local varieties.

Draw

Next, on the graph paper map the perimeters of your garden and the perimeters and dimensions of each garden bed. Mark where the water sources are. Using the notes you've made, mark off blocks and plug in the vegetables on your garden map. Make some kind of graphic to mark where each of the plants will grow. Take into account the individual plant needs and be creative about spacing. At this point you can also include companion planting, if you wish. You should certainly take in to account any antagonistic plants. Crop rotation is another consideration when planning a garden. Don't plant the same crop in the same soil two years in a row. It will tire the soil and create conditions for pests and disease.

As you consider how much to plant, think about the people you are trying to feed. Does everyone in the family consume one tomato each day? Does the family consume five pounds of zucchini squash each week or only two? How much will you need for canning purposes or to store? After a few years of keeping a record, this planning process will be easier.

Finish up

All that is left to do is to calculate how much seed of each vegetable you will need to buy and then to schedule the planting on the calendar. Fill out the order form and send it off!

Friday, January 16, 2015

A Homestead Bookshelf


How We Learn

A good friend of mine contends that you can do anything if you can read! I think her more distinct point is that you can learn to do anything if you can read, comprehend what you read, and then try it out. Cheryl is a great believer in self-education and experimentation. I just had a conversation with another friend who reminded me that some of us learn well by reading, but others of us learn better by listening or by being taught by someone. In fact, I recognize that there are several learning styles and each of us has the greatest probability of successful learning when we use the style that fits us best and, at the same time, take advantage of more than one method.

I think I learn best when someone shows me how to do something, but I also naturally gravitate toward reading. I truly love to read and am usually reading any number of books all at one time. I have stacks of books with various tags and bookmarks (along with notebooks and pencils) near my bed, on the table or counter, near my chair, in the car and often under my arm. I am never without reading material close by.

When it comes to learning new skills for use on the homestead, your bookshelf will look different than mine. What you choose to read will, of course, depend on which skills you are needing at the moment and your current interests. Indeed, your bookshelf may even reside in the cloud or on an electronic device. But I will describe my favorite homestead book and offer a recommendation.

On the Bookshelf

The topic of homesteading is very broad. The one book I know of that truly covers many of the basics is The Encyclopedia of Country Living: an Old Fashioned Recipe Book by Carla Emery. I've lived with this book for a long time. My first copy was the original trade published "Bantam" paper-back edition (1977). I received the book as a gift from my father to mark the occasion of my graduation from high school in 1978. I have since replaced that book with the ninth edition. If you don't mind reading from a screen, the ninth edition can be downloaded as a free pdf file on the internet. Just Google it. If you plan on downloading and printing it out, be aware that it is massive - over 800 pages. The book focuses on food production, including all aspects of raising animals for food, and covers preparing, preserving and storing food as well. There is a shorter, introductory section for odd topics such as finding land and staying warm in an Idaho winter. The writing style is casual and friendly. This book is a classic!

Recommendation

A comprehensive book such as the Encyclopedia really cover topics in a more general way and Carla wrote largely from her own experience and research. Some subjects are covered only briefly. There have been times when we have needed information in more depth than the Encyclopedia offered. In these cases we have never been disappointed with the Storey Guides. There seems to be a guide for about everything we've wanted or needed to know. Many of the guides for raising particular animals were assigned reading for our children as we added different animals to the homestead. The guides, bulletins and books are really good. If it is published by Storey, I feel like I can trust it.

The Backyard Homestead, edited by Carleen Madigan and published by Storey is an introductory guide to homesteading and a great all-purpose book for growing food, including animals. If you need quality, in-depth information about just any homesteading topic, I recommend you look to see what else Storey offers on the subject.

What has been your most useful homesteading book?


Wednesday, January 14, 2015

Garden Dreams


January is garden dreaming time on the homestead. I have to be honest and say that our homestead gardening motto could be stated: "Gardening? Dream On!"  We really struggle to have a good garden here. I'll try to paint a picture.

First challenge: Our elevation is 7,000 feet. Our topography is high desert prairie, and our forty-acre homestead is flat and all native prairie grass - only a couple of trees. (There is a four-letter reason for this - wind! More on this later.) We are right on the edge of the Chihuahuan Desert and our lack of natural rainfall reflects this. Because of elevation, our average growing season is 119 days. I'm told to plan on May 5th as the last frost date, but in 2014 we had frost on May 28th!  Our usual first frost comes sometime in September, but we often have very nice weather through October. So, while the length of our growing season is pretty good, and can even be deliberately extended with careful planning, the altitude keeps the nights very cool and the daytime sun very strong. It makes for pleasant living, if you aren't a tomato.

Second debilitating challenge: The wind blows constantly on our homestead. I'm not exagerating. Now and then I get a pleasant surprise when I step outside and the wind isn't blowing, but usually I can count on the wind. I'm not sure why it blows here so consistently. I have my uneducated suspicions, but the reasons don't really matter. The wind blows and it sucks the water from the plants quicker than the laundry on the line. It took several years to understand that our garden problem was not merely the lack of available water, but rather the ferocious wind. We have tried several barrier ideas that have helped a little. Planting in stacked tires has been the most helpful solution for some plants. We have finally built a large storage shed on the windward side of the garden this last year and, although the shed intrduces other issues, we hope it will help reduce the #1 problem of wind. If we can tap into some additional water (see the next challenge) I am going to try planting a vining windbreak this year.

Third challenge: We live in the desert pretty much. We just don't get enough consistent rainfall to produce the beautiful gardens you see in more richly blessed areas. We have a very short green-up of early grass in the spring and then there really isn't much green anywhere. Trees are scarce. So the garden and fruit trees must be irrigated and irrigation water is very precious. Our goals for the garden this year include better irrigation ideas and a water harvesting system to catch the summer monsoon.

Fourth challenge: Our soil is very rocky and highly alkaline. If that isn't enough, there is a thick layer of caliche that underlies everything. We have worked on this problem for many years in our garden spot. We've added admendments to the soil and it is now a pretty good growing space. But this is another reason why there are few trees on the property. You have to dig a massive hole to get past the caliche layer and create room for the tree roots to grow. We don't have a back hoe, so that means digging by hand. It is pretty easy to put this off.

Fifth challenge: Discouragement, plain and simple. We have struggled and failed with our garden so many times that it just seems impossible to harvest enough food to make it worth spending precious water. A couple of years ago our well went dry and that created enough discouragement for a lifetime. Praise God we drilled again and found deeper water, but we haven't had the usual garden since then. However I am the daughter of several generations of farmers and I learned the proper mantra; "Maybe this year!" We have made more plans and refined more goals and we are trying it again this year.

Which brings me back to January dreaming. I am deep into the process of choosing what to plant this year. I'm reading about varieties and paying particular attention to locally successful plants as well as water-efficiency and hardiness. There is a lot to choose from and I don't have much room for experimentation. I think I may need more hot cocoa...


Monday, January 12, 2015

Our Ethics

Acknowledge God
Be intentional
Be honest
Reduce consumption
Be a good neighbor
Freely share what we know
Do it ourselves
Grow food
Reduce waste
Live gently on the earth


Where It Begins


There is something about having grey hair that makes a person feel qualified to offer advice. My husband Kerry and I (Kathleen) have been living a homestead life for way over 20 years now and find that we have knowledge and experience that we could share. We are trying to live even more deliberately the philosophy and ethics that brought us together.

It is so easy to be swept up in a lifestyle reflected by society and community and culture. It is much, much harder to be deliberate in your choices and to actually live out a life that reflects your personal beliefs. We recognize that many more people are experimenting with homesteading principles and we have decided to be more public with our lives and try to share what we know with others who wish a fellow traveler on the road less traveled. Welcome to our home!