Thursday, August 27, 2015

Washing Wool


I want to share how I wash wool. The picture above shows my husband Kerry shearing the sheep. He shears sheep all over the countryside around here, and even travels overnight to some larger flocks. He shears mainly small, backyard flocks for hand spinners like ourselves. AND, he uses hand shears, which is another story altogether.

So, on to wool washing. Once I have the wool fleece, the next step is to separate a small portion and "pick" it to remove as much vegetable matter as possible before washing. Depending on how dirty the fleece is, this can be quite a job.


I place the portion of fleece loosely into a mesh lingerie bag.


I use three buckets, lined up in my bathtub to wash the wool. I'll just say that there are many ways to wash wool. Everyone seems to have their favorite method. Some folks just use their washing machine. Some others have a kind of set up in the backyard. Using the bathtub to soak a whole fleece  is another method I've heard of, but I don't want this very dirty water to go down the drain into the septic tank, so I use buckets and lift and carry them to pour outside.  I fill two of the three buckets with water as hot as my water heater can deliver. The hotter the water the better to melt and remove the lanolin.  Then I add a tablespoon of Dawn dish soap. Lower the soap into the water, but don't swish it. Just let it melt off the spoon and disperse into the water. Suds are harder to remove later in the rinse, so I don't make bubbles.


When the soap has melted into the water, I gently lower the bag into the bucket and leave the wool to soak. Set a kitchen timer for 20 minutes.


When the timer signals, lift the bag into the second bucket. If the wool is particularly dirty, this bucket is a second wash with just a bit more soap. Perhaps a half teaspoon, or so. If the wool isn't too dirty, this second bucket is the first rinse. You can tell how dirty the wool is by the color of the wash water. If the water is very brown, I do another wash. Because we live in a dry, windy place, I almost always have to wash twice, but maybe you won't have to. By the way, the reason I filled this bucket with water at the same time as the first bucket is because the water will cool at the same rate and be the same temperature as the first bucket. This can be important so that you don't "shock" the wool by changing the temperature of the water. If the water is significantly different, this difference in temperature may affect the way the lanolin acts and it may also cause some felting. I've not had trouble with this, but am careful still.


Sometimes I have to do a third wash. While waiting for this last wash soak, I refill the other two buckets for the rinse. I try to judge and adjust the temperature of the water so that it remains as constant as possible.


Just as the washing, I lift the bag from one rinse bucket to another and time twenty minutes for each soak. I always do at least two rinses. Sometimes I will put a half cup of vinegar into the last rinse.


After the final rinse, I lift the bag and let it drain until it isn't dripping. Then I take it outside and whirl the bag around my head to allow centrifugal force to remove as much water as can be. Stand well away from everyone you don't want to get wet!


Then I take the wool from the bag and fluff it out onto a towel. At this point I can see whether the wool is clean or if there is still lanolin clumped in it. A little lanolin doesn't bother me, as long as the dirt is gone and it feels and smells clean. The wool will always smell a little like lanolin and wet wool, but it should have a clean smell also. Let the clean wool dry in a protected place, away from the wind. My enclosed back porch is perfect since then I don't have to smell wet wool inside the house. If the wool still seems dirty, just let it dry and then repeat the wash process.


Once the wool is dry, I like to store it in a brown paper bag. This batch of wool was for Abigail's projects and it fit into a shoebox. Another cardboard box would work too. Many people store their wool in plastic totes or other containers. Paper grocery bags work well for me. Although I haven't had too much trouble with moths, I have a natural moth sachet recipe to help discourage them and try to regularly check the stored wool to make sure it isn't infested.


There are times when I wish I had a better system. It would be nice to wash more wool at one time, and I would rather not carry buckets through the house. But there are benefits to doing small batches as well, so I try to be content.

Friday, May 22, 2015

Colors and Patterns in Finnsheep


Finn sheep have the potential for several different color variations. These colors are buried deep in the genes of the sheep - both the ewes and the rams. White is probably the most common color found in Finn sheep, but there are other natural solid colors and variegated shades that show up in characteristic patterns. Finn sheep are genetically part of a group of sheep called the Northern Short-Tailed breeds. So they typically exhibit the same patterns and colors as the Shetland and Icelandic breeds. I cannot even try to explain color genetics. Detailed information is found on the International Finnsheep Breeders Registry. I simply offer the following short explanation of why our Finn sheep look the way they do. There are basically two factors at work to determine what we see: color and pattern.

We have two white Finn ewes. White is the dominate color for Finn sheep. To be called white, the fleece must be white and the skin and tongue pink. These fleeces are prized because they allow one to use dye without worrying about the presence of other natural color. But we also love the beautifully natural colors of our remaining ewes and rams.

Colored sheep are always genetically either black or brown. Black is dominant and brown recessive. Black lambs present black wool, with black skin and tongue and black hair on their face and legs. Brown lambs have brown wool and a dark reddish/brown tongue and skin. The hair on their face and legs is also brown.

A lamb could also present a "dilute" pattern, meaning that its solid black or brown colored fleece might become more pale as it grows, fading from black to grey or from brown to fawn as the new wool emerges.

Finn sheep have a couple of common patterns and markings. The badgerface marking exhibits badger "stripes" along either side of the face. The jaw, throat, chest, belly and legs and the inside of their ears will be dark colored as well - black if they are colored black and brown if they are brown. The fleece will be usually be a light to medium variegated color.

The HST pattern (head, socks, tail) shows white markings such as lines, stripes, stars, spots, patches, or a blaze on the head, legs and/or feet, and tail. Our little black rams, born this year, are HST. Their little tails and feet look like they were dipped in white paint! Usually the white marking appears on all three spots (HST) or in some combination. These sheep are considered solid colored sheep but with the HST marking.

A "piebald" marking is more rare and is not actually a pattern since it can occur in either color and with other patterns. It will not appear in a true white sheep. Pie-bald exhibits irregular white spots in the fleece section of the body of the sheep. The spots could be large, even very large. Our all white ram has one small spot on his rear hip. This means that he is actually a "black" sheep with an enormous white patch! What is unique about the pie-bald is that the white colored wool grows from pink skin and the colored wool from colored skin. It is a recessive marking, meaning that both the ram and the ewe must carry the gene in order for the resulting lamb to exhibit the marking.

Pheomelanin is the presence of a peach or tan color in a newborn Finn lamb. This color is often found in the hair on the legs or face of the lamb. It isn't actually genetic color, but rather a pigmentation that is usually gone by about six months. Our little white lambs, born to Nutmeg this year, have this coloring on their legs.

The patterns and colors of our colored Finn sheep are fascinating. Color genetics and breeding for color and pattern can be quite complicated. I leave all of those decisions to Kerry and just happily wait to see what appears when the lambs are born.


Monday, May 18, 2015

More Babies


We just love new babies! These triplets belong to Star, who gives us triplets pretty consistently. They were all vigorous and healthy and were up and nursing right away. The little spotted white one is a ewe lamb and the other two are ram lambs.


Friday, May 8, 2015

Hooray for the Rain!


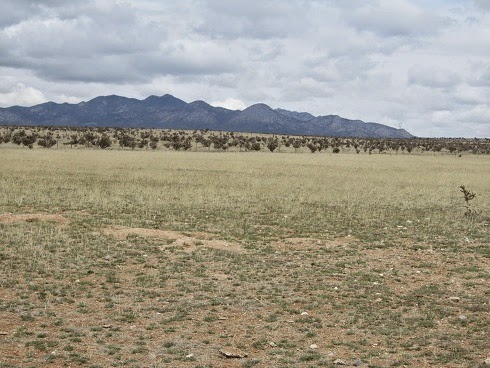
We have had a little rain finally. Not nearly as much as we were hoping for, but the green grass is coming up now. Our landscape is so thirsty that it responds with new growth immediately. One can almost imagine watching it grow. What a blessing this rain is!

Wednesday, May 6, 2015

New Babies


This is our Bella with her new lambs. She had twins this year, a little ewe lamb and a ram lamb. They are both white with no other color to speak of. At least not yet. They are darling little things and strong and vigorous. Abigail is holding Bella just before she gave birth. You can see what a lovely udder Bella has made. Lots of milk for these two.


This is Nutmeg and her new babies. She also had twins. A mostly white ram lamb with light brown color on his legs and a mostly white ewe lamb, with some color on her legs and a large brown spot encompassing her left ear. These lambs were also born strong and healthy, thank goodness.


Friday, April 24, 2015

Late Spring Nutrition for Sheep


Late spring is the hardest nutritional time of year for sheep. Even though it is a little warmer, there is still little nutrition on the landscape. Plants from last year are bleached of nutrients and this year's growth is yet in its earliest stages. High elevation landscapes are still cold, windy and dry, further retarding new plant growth. This leaves our sheep still relying heavily on stored nutrients and stored energy from last year. The situation for the ewes is further complicated by pregnancy. So feeding has to be done carefully.

Over conditioning ewes with too much nutrition and too much fat, can result in metabolic disorders during the final phases of pregnancy. As a sheep shearer, I see many a backyard sheep that is too fat. However, too little conditioning before lambing leaves a ewe with not enough milk to nurse the new-born lambs. So proper feeding is heavily dependent on the ability of the flockmaster to evaluate and judge the condition of the sheep, especially ewes.

The best way to get ewes in condition for lambing is to supplement their forage with a concentrate, such as corn or a mixed grain. The supplemental grain has a high level of phosphorous and energy. The pregnant ewes need an adequate amount of fat cover without being overly fat. At the time of lambing, the ewe's body will be called on to abruptly provide an increased amount of calcium into her milk supply as the new lambs begin to nurse. That amount of calcium will be on an increasing plane as the lambs grow. At some weeks prior to the time of lambing, flockmasters should begin to provide forage with high levels of calcium. So, reducing the grain and, at the same time, increasing the amount of green forage, such as good quality hay, will make an increasing amount of calcium available. If there is fresh green grass in the pasture, this is also highly nutritious and rich in calcium.

After the lambs are born and nursing, and ewes are back to normal feeding, adequate amounts of energy again become important. A diet rich in energy, protein and calcium is important. Flockmasters need to provide an adequate amount of green forage, especially leafy forage, if it is available. The ewe diet can again be supplemented with a concentrate such as grain to boost energy during lactation.

We choose to lamb later in the spring with the hopes that we will have had some rain to begin the new growth on our landscape. This growth really benefits the new lambs and the mothers. On a dry year, we don't see green grass until June. On a windy year, any new grass is dessicated. These challenges make a good supply of green hay important to find, even though the weather is warm and the sun is shining. We had a bit of early green up, but with no rain yet, this early grass has begun to dry out. While we anxiously await our lambing this year, we're praying for rain.

You can see that our spring forage isn't very good yet!

A treat once in a while, given by Abigail, doesn't hurt either!

Saturday, February 28, 2015

Thoughts

"Pride gets no pleasure out of having something, only out of having more of it than the next man. ...It is the comparison that makes you proud: the pleasure of being above the rest. Once the element of competition has gone; pride has gone."  -- C.S. Lewis


I need to remember this quote and read it more often. Although I still feel like I am talking to an empty room, I realize that, if I want to build a blog, I have to post occasionally. But this last month I also have realized that perhaps I jumped the gun. Maybe I really don't want to expose my life to the world.

In these last few months I have read more than a few articles about building blogs and marketing your farm products and using social media to connect with your like-minded community. I have looked at and read more blogs about homesteading than I thought even existed and I really don't recognize us in most of them. Maybe I'm confused about what a homestead even is. I do think the concept is being redefined and perhaps even revolutionized.

There are so many people involved in so many aspects of homesteading from the prepper/survivalist at one end of the spectrum to the newest DoTerra mommy in an apartment building on the other. It almost seems that there cannot even be a definition of who a homesteader is. I think what I've noticed more than anything is a subtle feeling of competition. Perhaps it is silly, but it seems that everyone wants to appear to be an expert at homesteading whatever their real situation may be. I've seen so many blog posts with titles designed to capture the market (as if we are a market) and make us afraid we might miss out on some special knowledge that will surely help us succeed. And here I've always thought of homesteading as a kind of experiment; just a kind of out-of-the-way, hippie sort-of, minimal way of living. Maybe that experimental aspect is what makes the idea homesteading so inclusive, but many homesteading blogs try pretty hard to outdo the competition. I really hate to feel as if I am in a competition.

Which brings me to my problem and the point of this post. I am feeling frozen and isolated and more than a little bit unprepared to tackle all of that. I know we cannot compete with the beautiful homestead blogs out there. Our life is what it is. We are doing some of the "proper homesteading things" and not doing some others. It takes us ages to get anything done. Our house is old and half painted. Our sheds and gates and fences are built by family members who don't have construction experience beyond building said structure. We have resources (read junk) all around us, getting in the way of the beautiful pictures I might post. We don't have much (any) money for large projects like greenhouses or chicken mansions or a painted gingerbread clothesline or even a covered compost bin. Our garden is the single most challenging project we try to do and it appears that not having a great garden might exclude us from the homestead club right away. The experts tell me that I need to post often and always include a beautiful photo. They say that our posts need to be meaningful, and frankly, more meaningful than posts from other blogs or readers will click away. Hmmm. Discouraging. And baffling, really, since I'm not sure what meaningful might be.

Kerry and I have talked and planned and set goals for our future, but I am old enough to realize that life has a funny way of changing your plans and seeming to block your goals. We live a truly fabulous life together in a beautiful place. We are doing the things we love, and we know just a thing or two about those things. We would like to share these things, but we are not experts. Just so you know. If you need a photo, you'll have to page on. 

Wednesday, February 4, 2015

"Shepherds of the Desert"


I looked Kerry up on Google this morning and the newspaper article "Shepherds of the Desert" popped up. It was fun to read it again and I thought I would share it here on the blog. It might help you all to get to know us a bit better. We've teased Kerry pretty hard about the opening description for some years now, but when the shoe fits...

We hope you enjoy the article. Our life is a little different nine years down the road, but not a lot actually. We still love sheep and dogs. But we dearly miss Gyp, Tess and Rosie as they have gone on to the reward of all faithful farm dogs. One day soon I'll introduce you to the dogs and sheep whom we are loving at the moment.

Saturday, January 31, 2015

Apple Puff Pancake


I love a nice weekend breakfast. Apple Puff Pancake is a favorite cast-iron recipe. I assure you, it meets all the expectations. It looks delicious, so it's perfect for guests. It is quick and easy to stir up. It is inexpensive to make and the apple and eggs are value-added. Try it. BTW, if you don't have a cast iron skillet, just substitute a deep dish pie plate.

Apple Puff Pancake

4 eggs
3/4 cup flour
1/4 teaspoon soda
3/4 cup milk
dash of salt
3 tablespoons butter
2 tablespoons sugar
1/ teaspoon cinnamon
1 apple, cored and thinly sliced
powdered sugar to garnish
maple syrup

Preheat oven to 400 degrees. Place a 12-inch cast-iron skillet in oven to heat. Beat eggs. Then add flour, soda, milk and salt; whisk until smooth. Remove skillet from oven. Add butter to skillet and coat all sides. In a small bowl, mix sugar and cinnamon. Toss with apple slices. Arrange apples in a layer in bottom of skillet. Pour egg batter over apples. Bake uncovered for 25 minutes, or until pancake is puffy and golden brown. Makes one large pancake, which serves four. Best if served hot out of the oven with a sprinkle of powdered sugar and a little maple syrup.


Thursday, January 29, 2015

Tutorial: Shabby-Chic Sweatshirt


Plain pullover sweatshirts just make me look frumpy - and frumpy is the last adjective I want to add to an already bundled farmgirl style! But what's a country girl to do when I need the layer to stay warm? Plus a sweatshirt is a little more hard wearing and washable for everyday chores than a hand made wool sweater!

So here is an example of a fun sweatshirt makeover that gives me a bit of a longer line down the front and is cute in the bargain! I gathered several cuts of cotton from my quilting stash, along with a long length of recycled lace, my rotary cutting tools, my bias maker tool, regular sewing tools and thread to match the sweatshirt.


I started by cutting the bottom ribbing off. I used the seam line to guide my cut so the hem line would be even when I finished.


I marked a center cut line down the front. I also created a simple cardboard template and marked the curves at the neckline.


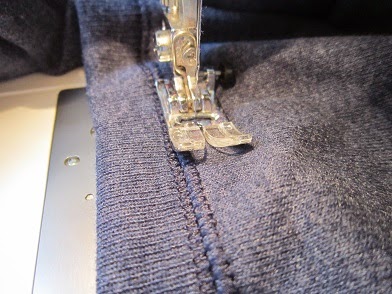
This next step is important! I stay-stitched on both sides of the cutting line BEFORE cutting so that the thin knit fabric would not pull out of shape later.


Then I cut on the marked lines and cut the ribbing off the neck.


Next, I cut the fabric for the patchwork ruffle. In order to figure out much fabric I needed, I measured the bottom edge of the sweatshirt and doubled that measurement. Allowing for 1/4-inch seams, I cut enough "patches" sized to equal that number. Doubling the measurement of the bottom of the sweatshirt makes a very ruffly ruffle. If you don't want that much ruffle, use a 1.5 measurement instead. I made the length of my ruffle 8 inches. It could be shorter, but I was going for a tunic length.


I sewed the patches together and finished the edges with a zig-zag stitch. Then I pressed the seams to one side and finished the edge of the entire ruffle with a zig-zag as well.


I sewed the lace on the right side of the ruffle, turned and pressed, and then sewed a finish seam along the fabric edge.


I sewed both lines of the gathering stitches. One at 1/4-inch and the other at 5/8-inch from the edge. Then I found and marked the center back measurement with pins.


With the right sides together, I matched the pins at the center back. Then pulled up the gathers evenly along the length and pinned the ruffle to the sweatshirt.


I used a 3/8-inch seam and sewed the ruffle to the sweatshirt. I turned the seam and topstitched along the edge of the sweatshirt, using a fairly long stitch and being careful not to stretch the knit. Then I pulled the gathering threads.


At this point, I needed to make the binding for the edge of the sweatshirt. First, I cut a square of binding fabric. The size of the square depends on how much binding you want. I cut a 20-inch square. I folded the square into a triangle along the bias grain and pressed this edge. Then I used my scissors to cut this pressed line, creating a long bias edge on two triangles of fabric.


With wrong sides together, I used my rotary ruler to measure and cut several 1.75-inch strips from this bias edge. Of course, the strips get shorter and shorter as you get nearer to points of the triangle.


I pinned the strips together at right angles and, with the right sides together, I sewed all the strips into one long bias strip.


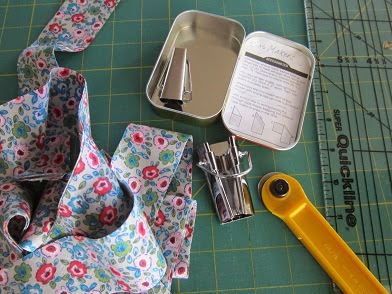
I fed the strip into the widest end of my handy bias maker tool and pressed. I have the iron temperature at something less than cotton, but still hot enough to press a nice edge. I don't want to scorch the fabric while I am fussing to keep the folds even.


I pinned the bias strip to the edge of the sweatshirt, starting at the bottom of the lace on the ruffle. Then, I sewed the edging on, using a 1/4-inch seam.


I turned the bias edging and pinned it on the back. The ends are trimmed and folded up to enclose the lace edge. The back side of the bias needs to be pinned carefully so that the edge comes all the way to the seam, otherwise the finish seam on the front won't catch the edge on the back. If this should happen, and it seems to sometimes, however careful I might be, I just use a needle and thread and hand sew those little gaps. Once the bias edging is pinned on the back, I turned to the front and carefully sewed a finish seam.


I made some tab closures for buttons and sewed these to the top, near the neckline. I used three different buttons to match the patchwork style. Finished!