
Plain pullover sweatshirts just make me look frumpy - and frumpy is the last adjective I want to add to an already bundled farmgirl style! But what's a country girl to do when I need the layer to stay warm? Plus a sweatshirt is a little more hard wearing and washable for everyday chores than a hand made wool sweater!
So here is an example of a fun sweatshirt makeover that gives me a bit of a longer line down the front and is cute in the bargain! I gathered several cuts of cotton from my quilting stash, along with a long length of recycled lace, my rotary cutting tools, my bias maker tool, regular sewing tools and thread to match the sweatshirt.

I started by cutting the bottom ribbing off. I used the seam line to guide my cut so the hem line would be even when I finished.

I marked a center cut line down the front. I also created a simple cardboard template and marked the curves at the neckline.


This next step is important! I stay-stitched on both sides of the cutting line BEFORE cutting so that the thin knit fabric would not pull out of shape later.

Then I cut on the marked lines and cut the ribbing off the neck.


Next, I cut the fabric for the patchwork ruffle. In order to figure out much fabric I needed, I measured the bottom edge of the sweatshirt and doubled that measurement. Allowing for 1/4-inch seams, I cut enough "patches" sized to equal that number. Doubling the measurement of the bottom of the sweatshirt makes a very ruffly ruffle. If you don't want that much ruffle, use a 1.5 measurement instead. I made the length of my ruffle 8 inches. It could be shorter, but I was going for a tunic length.

I sewed the patches together and finished the edges with a zig-zag stitch. Then I pressed the seams to one side and finished the edge of the entire ruffle with a zig-zag as well.


I sewed the lace on the right side of the ruffle, turned and pressed, and then sewed a finish seam along the fabric edge.

I sewed both lines of the gathering stitches. One at 1/4-inch and the other at 5/8-inch from the edge. Then I found and marked the center back measurement with pins.


With the right sides together, I matched the pins at the center back. Then pulled up the gathers evenly along the length and pinned the ruffle to the sweatshirt.

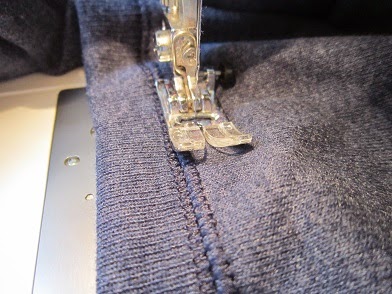
I used a 3/8-inch seam and sewed the ruffle to the sweatshirt. I turned the seam and topstitched along the edge of the sweatshirt, using a fairly long stitch and being careful not to stretch the knit. Then I pulled the gathering threads.


At this point, I needed to make the binding for the edge of the sweatshirt. First, I cut a square of binding fabric. The size of the square depends on how much binding you want. I cut a 20-inch square. I folded the square into a triangle along the bias grain and pressed this edge. Then I used my scissors to cut this pressed line, creating a long bias edge on two triangles of fabric.


With wrong sides together, I used my rotary ruler to measure and cut several 1.75-inch strips from this bias edge. Of course, the strips get shorter and shorter as you get nearer to points of the triangle.

I pinned the strips together at right angles and, with the right sides together, I sewed all the strips into one long bias strip.

I fed the strip into the widest end of my handy bias maker tool and pressed. I have the iron temperature at something less than cotton, but still hot enough to press a nice edge. I don't want to scorch the fabric while I am fussing to keep the folds even.

I pinned the bias strip to the edge of the sweatshirt, starting at the bottom of the lace on the ruffle. Then, I sewed the edging on, using a 1/4-inch seam.

I turned the bias edging and pinned it on the back. The ends are trimmed and folded up to enclose the lace edge. The back side of the bias needs to be pinned carefully so that the edge comes all the way to the seam, otherwise the finish seam on the front won't catch the edge on the back. If this should happen, and it seems to sometimes, however careful I might be, I just use a needle and thread and hand sew those little gaps. Once the bias edging is pinned on the back, I turned to the front and carefully sewed a finish seam.

I made some tab closures for buttons and sewed these to the top, near the neckline. I used three different buttons to match the patchwork style. Finished!


